
Nuget Package Management
NuGet is a package manager designed to enable developers to share reusable code. It is a software as a service solution whose client app is free and open-source. The Outercurve Foundation initially created it under the name NuPack. Since its introduction in 2010, NuGet has evolved into a larger ecosystem of tools and services.
We shall cover the following in this tutorial.
What we should do if the sample provided by Hemelix does not work
A. What we should do if the sample provided by Hemelix does not work
If the sample does not compile and you get an error, then you can remove the references and put the references back. But make sure the extension and Nuget package (for example Beckhoff.TwinCAT.HMI.Controls) match your HMI Engineering version
For example, in our sample, we are using the Nuget package Beckhoff.TwinCAT.HMI.Controls, we do the following:
=> Remove (uninstall the package) the package (our case, Beckhoff.TwinCAT.HMI.Controls) from the references
=> Re-install the packages (our case Beckhoff.TwinCAT.HMI.Controls) version as our HMI Engineering version(most sample we have used 12.752.0 Engineering version, some are with older version)
=> Build the solution
B. How to use existing Nuget packages
First, we need to tell the visual studio, where is the package source, it can be the central repository, on our own hard disk (downloaded from somewhere) or it can be built by ourselves.
=>In the Visual Studio, Tools | Nuget Package Manager | Package Manager Settings | Package Source
=>Give the right name as you like and update the source URL or other folder and press Update, the process is shown in the following image.
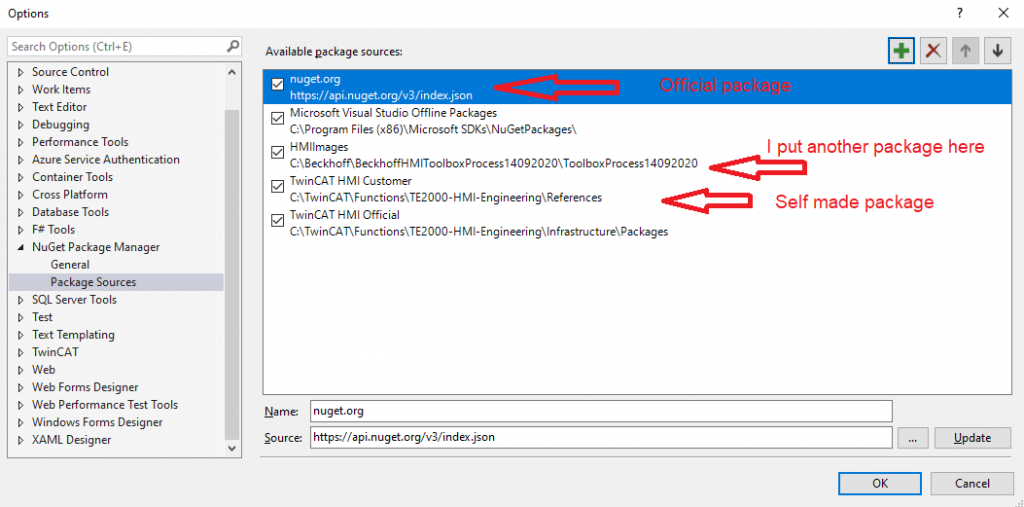
Figure 1: Nuget URL for sources settings
C. How to check your HMI Server Version:
When we update any Nuget package, then we must make sure it matches our installed HMI Server version (sometimes it may work new package with the existing HMI server version and sometimes not.). So always it is a good idea to synch the package. For example, I am using HMI server version Product Version: 1.12.752.0, Version: 1.12.752.0. If I want to install a new version (for example 1.12.758.8) later than 1.12.752.0, this may not work. If I want to use the features of 1.12.758.8 then it is a good idea to update the HMI Engineering to 1.12.758.8 (other stuff may not work, so we have to be careful about it).
Here is one way to check the version of the installed HMI Server
=> Open an HMI project in Visual Studio (this will load the HMI Server as well)
=> In the bottom right corner, place your mouse on the up arrow (Show hidden icons)
=> Right-click on the HMI server icon and go to the config page (http://127.0.0.1:3002/Config/TcHmiSrv)
=> At the lower left corner we see the version (We can go to the page directly as well http://127.0.0.1:3002/Config/TcHmiSrv)
These steps are described in the following image.
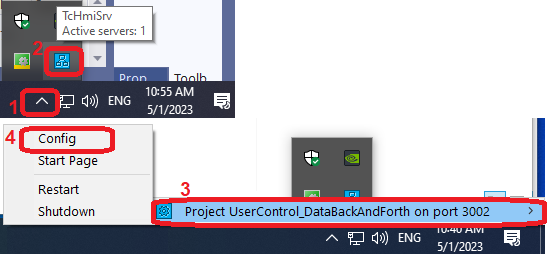
Figure 2: HMI version number checking
D. How to update my project from the repository that we have set:
Now we have set the package sources, now say we want to update a package or want to use a particular release, how should we do that?
=> In the Visual Studio Project | Manage Nuget Package
=> Now we can browse the package source, check our installed package, and update to the target version
=> Select Package source to All from TwinCAT HMI Official/TwinCAT HMI/All customer (or similar) as shown in the following image

Figure 3: Nuget packages update, Uninstall and version number
E. How to create my own Nuget package for the TwinCAT HMI project
Now let say, we want to create a package by ourselves and want to distribute it to the Nuget repository. We shall show it by an example that we have created in the visual studio.
=> We have an HMI project and then we have an extension project (check our extension tutorial for more), we want to make the extension project as a Nuget package and then install it to our HMI project.
=> Select the project | Create Nuget Package |
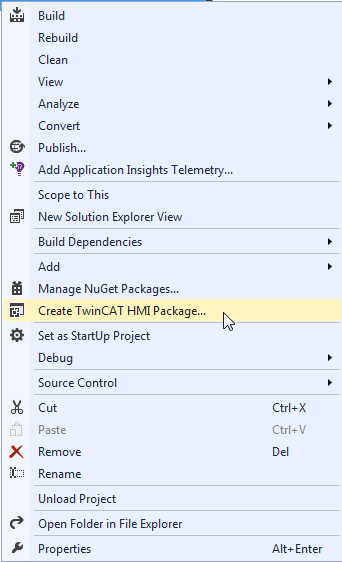
Figure 4: Nuget packages creation
If the package is already there it will show a dialog as shown in the following image.
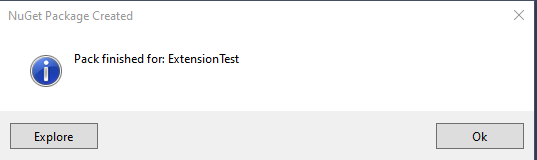
Figure 5: Nuget package creation status
Tip 01:
We may have a mismatch between the Nuget package from one TwinCAT HMI framework version to another. In this case, we need to update the corresponding Nuget package.
Sometimes the updated NuGet packages may not work directly, it can give a strange problem, one solution select the Nuget Package Manager Console and type then press enter
dotnet restore Tip 02: Sometimes, we might want to use pre release version. If the package is pre release version then you need to check the include prerelease otherwise it will not be visible and we may wonder where is my package and so on. It is shown in the following image.
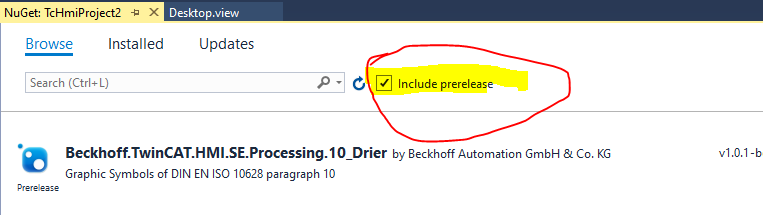
Figure 6: Nuget package pre release inclusion
Tip 03: The engineering version and Nuget packages version should be matching. If these are not matching then it may work or may not work.
=> Check the engineering version (Project | Server and double click on the ADS)
=> Check your package version as shown in Figure 2, if you don’t have a matching version then it may show as red under the Server folder.
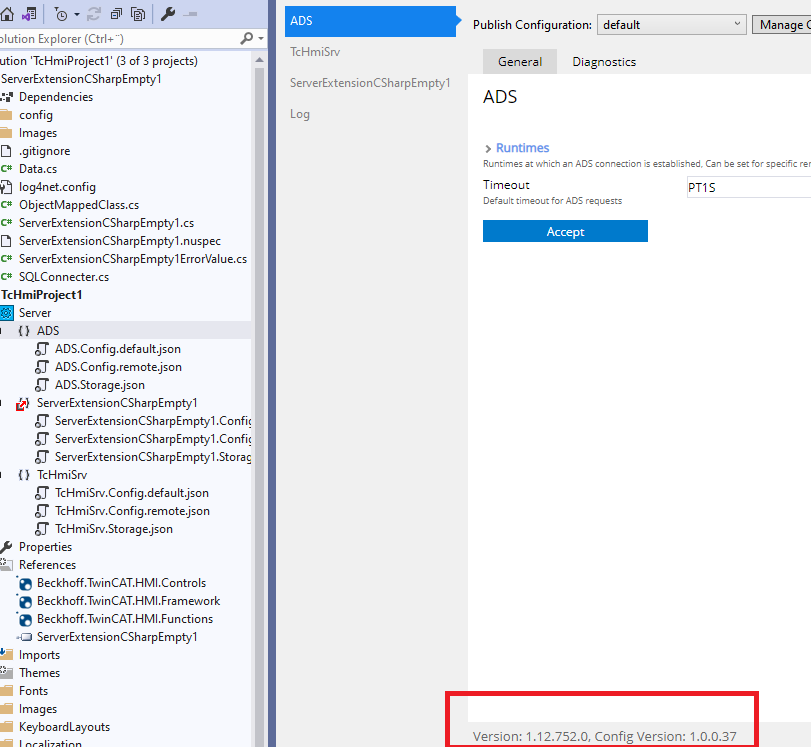
Figure 7: HMI Engineering version
Tip 04: You need to make sure that the package source and the package path match. For example, the paths in figure 1 are like this:
C:\Program Files (x86)\Microsoft SDKs\NuGetPackages <= note there is space in the file path after Files
C:\TwinCAT\Functions\TE2000-HMI-Engineering\Infrastructure\Packages
If you have put wrong information about the path and have spelled wrongly or should have space where should not be and there is no space even where should have space, etc can cause problems.
Tip 05: Unable to find package . No packages exist with this id in source. .NET core:
=> Tools=>Options=>Nuget Package Manager=>Click On Package Sources
Now add following Package (see the screenshot) and click on Ok.
Build your application and it will be error free.
You may need to update the Nuget package
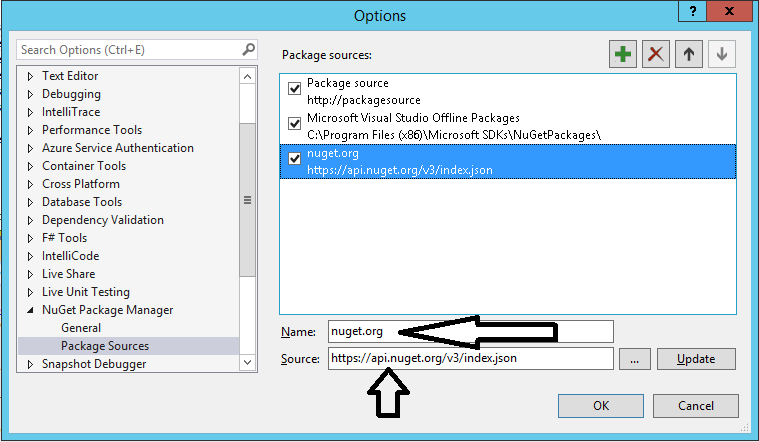
Figure 8: Nuget package configuration
References:
Now you have reached the end of our HMI tutorial, we hope it has been useful if you have any questions you could post to our google group. If you think it can be helpful to others don’t fare to share it.
Ask questions related to Hemelix sample code and design at Google group https://groups.google.com/g/hemelix