
My First TwinCAT HMI
We have installed the necessary tools according to the page https://www.hemelix.com/scada-hmi/twincat-hmi/twincat-hmi-installation/.
In this tutorial, we shall create a simple HMI application by using simple controls that are provided by the TwinCAT framework. This will show how easily we can create HMI in TwinCAT. This same sample will be used in the next exercise (https://www.hemelix.com/scada-hmi/twincat-hmi/twincat-hmi-with-plc-program/). We shall discuss also some issues like what is control when we talk about HMI.
Follow the following steps:
=> Fire your visual studio
=> File | New project
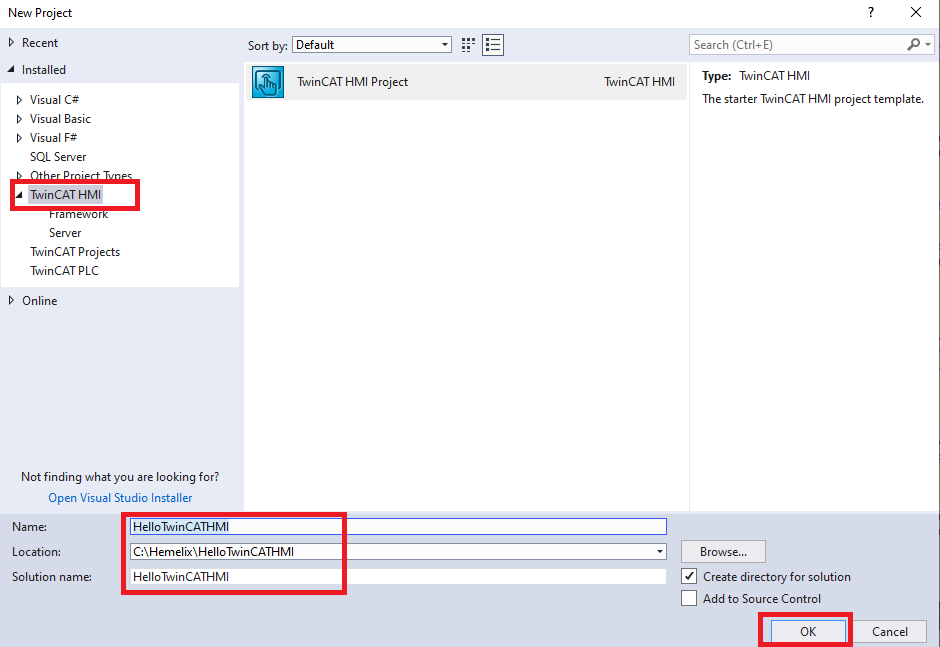
Figure 01: Crteating our first TwinCAT HMI application
Note: Visual Studio will create an empty Desktop.view
=> At this point, we have done our basic HMI with a default view, to run the HMI let’s follow the following steps
=> Go to the Build Menu of the Visual Studio and select Build Solution
=> Press on the live view (as shown in the following image)
Now our HMI is running but it does not get data from us or does not get data from somewhere to display for us. It does nothing but still it is an HMI. The Beckhoff logo is created by the TwinCAT framework but that can be selected and deleted.
=> It will show a view like the following screenshot

Figure 02: Displaying empty desktop view
=> We shall bring a textblock control to display “Hello TwinCAT HMI”
=> Make the toolbox visible (View | ToolBox Or Ctrl+Alt+X) , Tool box should be visible.
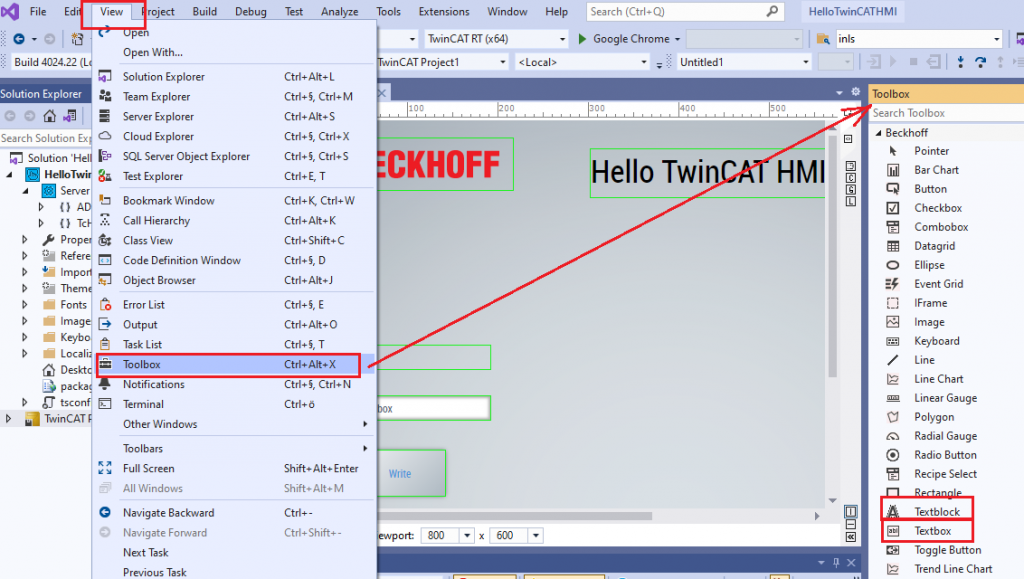
Figure 03: Toolbox and control in the Visual Studio
=> Find the Textblock control in the Toolbox and select it. Textblock allow to display only text data to HMI
=> Hold the mouse left button and drag it to the HMI and drop it on some suitable place.
Note: Controls are UI elements that determine how data, text, images, and other information appear on the user interface
=> Select the text block (if not selected, just by clicking on it) and bring the property window (F4 or View | Properties Window)
=> Change the text of the text blocks to “Hello TwinCAT HMI” and position it on the top by drag. Also change the TextFontSize to 40 for example.
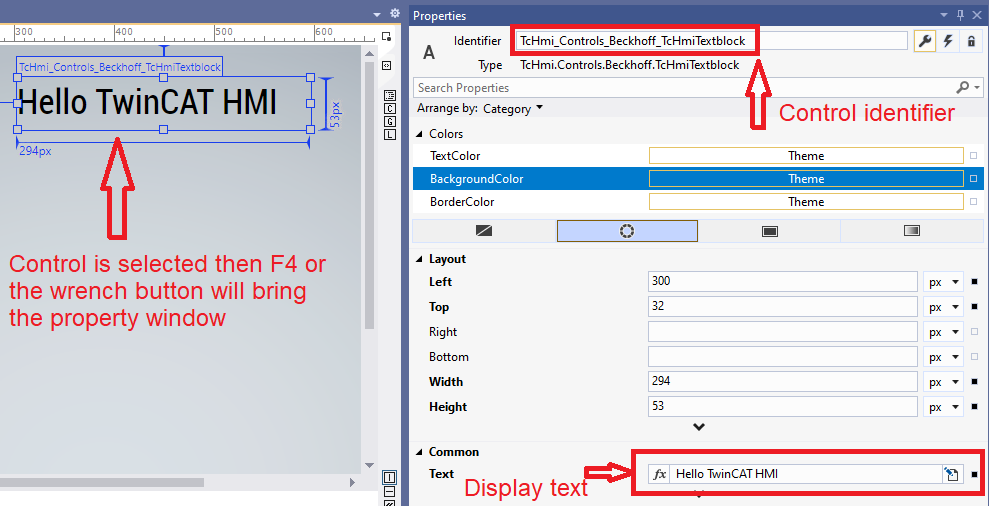
Figure 04: Control selection and identifier
=> Control Identifier and the control properties are very important. We can select a control by JavaScript and manipulate its properties.
=> In the above image, we can see identifier and many properties ( for example, left, Top, Text, etc)
=> By using a little square on the right side, we can configure the properties (we shall show these later in many examples)
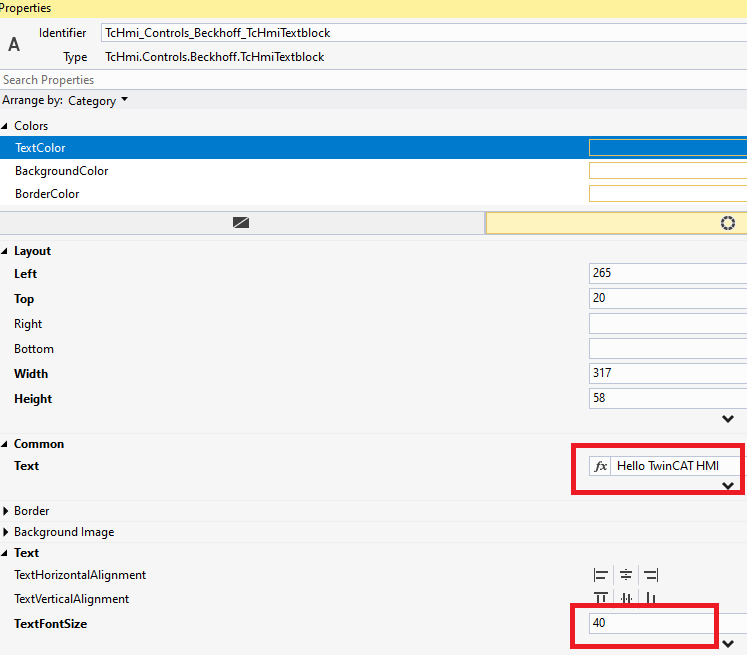
Figure 05: Text and font selection
=> The HMI is ready now and it should be like the following. If you press on the live view you can see it is running. On the other hand, you can press on the browser to load and run inside the browser. We can configure to any browser of our choice.
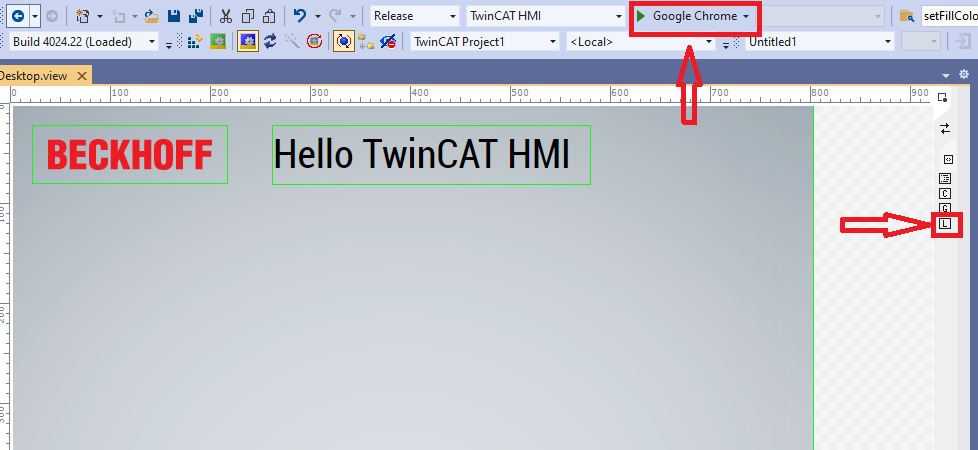
Figure 06: The HMI can be tested in the browser or by the Live view
Youtube Video
Tips
01
You may have noticed each control has a unique identifier, for example, TcHmi_Controls_Beckhoff_TcHmiTextblock is the identifier of the text block “Hello TwinCAT HMI” and TcHmi_Controls_Beckhoff_TcHmiTextblock_1 is the identifier of other text blocks where we display the integer variable from the PLC. It is a good idea to rename it to a more expressive one. The framework adds _1, _2, etc based on the order we do drag and drop.
02
If we don’t see the symbols from ADS in all symbols and there are warnings in mapped symbols (when we try to map) then do the following.
You were probably running another project on your PLC, current program must be activated first.
You could try also the following:
=> Restart Visual Studio
=> Activate the PLC program again (the hello TwinCAT)
More on controls
Controls in general
=> In the Toolbox there are few groups of controls, we can pick a control and configure it based on our needs. In the follwong example, we can change the text of our Textblock in the following way.
//Get a reference by using the textblock identifier
var myTextblock = TcHmi.Controls.get('TcHmi_Controls_Beckhoff_TcHmiTextblock');
if(myTextblock ) {
    //Change the text by using setText function provided by TwinCAT framework
    myTextblock.setText('New Text');
}
For control, we have many properties that can be controlled by JavaScript. Some of the properties are:
FillColor => Defines the fill color of the control.
StrokeColor => Defines the stroke color of the control.
BackgroundColor => Definition of the background color. This is displayed if no background image or a transparent background image is set.
BorderColor => A border is only displayed if Border Color, Border Width and Border Style have been set.
Change the Background of TextBlock

Figure 07: Changing background color
We can change the background color of the text block in the following way:
=> We don’t need to do anything with the text block
=> We put the following code behind each button to make the corresponding colour similar
//behind the red button
var redColor = {
                "color": "rgba(255, 0, 0, 1)"
			}
var output1Control = TcHmi.Controls.get("TcHmiTextblock_HelloTwinCATHMI");
output1Control.setBackgroundColor(redColor);
//behind the green button
var greenColor = {
                "color": "rgba(0, 255, 0, 1)"
			}
var output1Control = TcHmi.Controls.get("TcHmiTextblock_HelloTwinCATHMI");
output1Control.setBackgroundColor(greenColor);
//behind the blue button
var blueColor = {
                "color": "rgba(0, 0, 255, 1)"
			}
var output1Control = TcHmi.Controls.get("TcHmiTextblock_HelloTwinCATHMI");
output1Control.setBackgroundColor(blueColor);
We can write the color code in the following way as well (single quote or double quote)
var redColor = {
                'color': 'rgba(255, 0, 0, 1)'
	       }
Download
Tips
=> Sometimes, if we want to show a string to a control, for example, to some TcHmiTextblock, then we must make sure that the width of the control is higher so the string will fit. If the width is smaller, then the string will not be visible, and we have to scratch our heads as to why it does not show.
=> Attached event, when a control or view is attached, then the view Attached event is called. After that, all the other controls are attached as those are declared in the content page

Adding Icon file to project
=> Add the icon file (Fabicon.ico) in the image folder and add it to project. Remember to remove the cache from chrome or edge so it can be used. See the following image.

Figure 08: Actual icon file in the project and running website shows the icon (lower part)
Next
Download the sample code from the link given above and test it.
See next our Linear Gauge example at https://www.hemelix.com/scada-hmi/twincat-hmi/twincat-hmi-with-plc-program/
Ask questions related to Hemelix sample code and design at Google group https://groups.google.com/g/hemelix