Display Tree like nodes to TwinCAT HMI
Display Tree like nodes to TwinCAT HMI
The HTML Host control displays an HTML page from a given URL or a local file. The associated HTML page can be static or dynamic by using JavaScript (embedded or external). The HTML Host control can be used to display a rich user interface package by leveraging the power and expressiveness of WebUI (HTML, CSS, JavaScript).
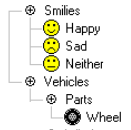
The sample example is like this, you select a node from the left-hand side and in the text block, we display the name of the selection. There is also an image file where we display an image to identify the changes visually. By this, we can select a device-specific page or content depending on the context. On the left-hand side, we have a tree-like data structure. If we select an item then we display the component name (in a text block) and an image.
In TwinCAT HMI Engineering, we can insert an HTML HOST control and insert a DIV element.
The <div> tag defines a division or a section in an HTML document. The <div> tag is used as a container for HTML elements – which is then styled with CSS or manipulated with JavaScript. The <div> tag is easily styled by using the class or id attribute. Any sort of content can be put inside the <div> tag!
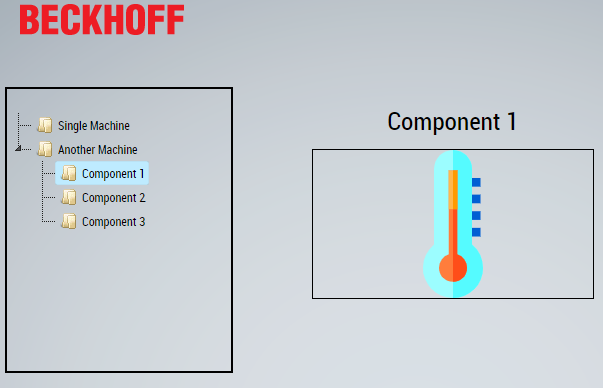
Figure 01: Main view of the application
How to design the HMI
In TwinCAT Engineering, the HTML host is a container for HTML contents where the control can be edited in the HTML editor of the Designer.
=> Fire Visual Studio and create an HMI project by using the default template (if first time check out how to start at https://www.hemelix.com/scada-hmi/twincat-hmi/twincat-hmi-installation/)
=>Create a folder in the solution explorer of the project, rename the folder as JSTree.
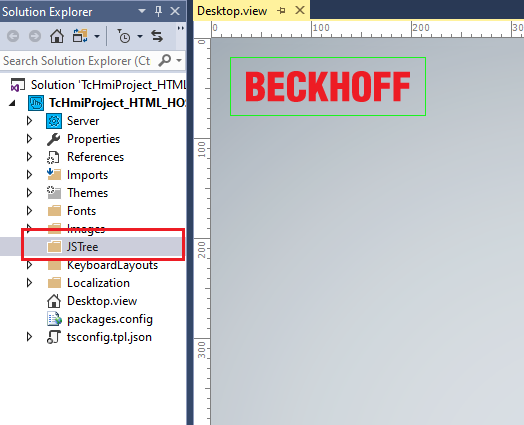
Figure 02: JSTree folder for storing JS related code
=> Download JSTree from the site https://www.jstree.com/ and extract it somewhere.
=>Create a folder in the solution explorer of the project, rename the folder as JSTree.
=>Bring the toolbox visible (View | toolbox or Control + Alt + x)
=>Drag and Drop HTML Host control from the toolbox to Desktop view
=>Resize border, reposition, etc based on your imagination
=>Drag and drop Textblock control and an image control and position those to right side of the HTML HOST control
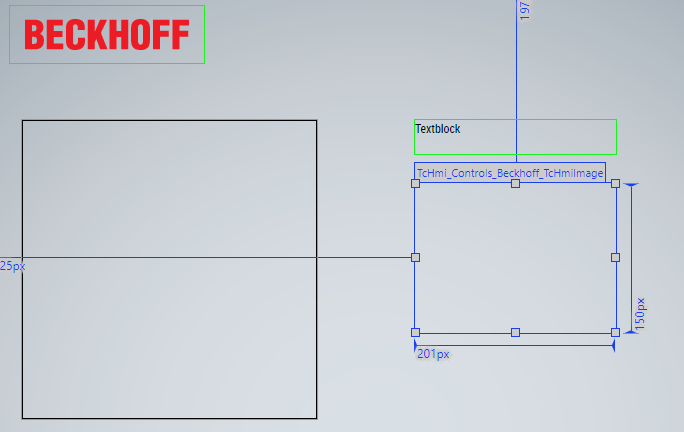
Figure 03: HTML Host control (left) and image control (right)
=> Make sure that the Identifier (ID) of the text block and the image control matches as TcHmi_Controls_Beckhoff_TcHmiTextblock and TcHmi_Controls_Beckhoff_TcHmiImage respectively.
=> Add a few images to the images folder based on your wishes, you can copy the project and extract the images and insert them to the folder (just for practice)
=> Make visible the Desktop.view HTML code for editing (In the Desktop.view slowly move your mouse below the default toolbar on the right side and make the editor bigger or press on the swap code/design view icons)
=>Find the TcHmi_Controls_System_TcHmiHtmlHost DIV block and insert the following code below the DIV block (see the image below as well)
      <script src="JSTree/jstree.min.js"></script>
      <link rel="stylesheet" href="JSTree/themes/default/style.min.css" />
      <div id="using_json_2" class="demo" style="margin-top:2em;"></div>

Figure 04: JavaScript inside the HTML Host control
=> Create a script section and insert the following code, compile and test, you are DONE!
The related JavaScript code:
      <script>
          $(function () {
          $('#using_json_2').jstree({
              'core': {
                  'data': [
                      { "id": "ajson1", "parent": "#", "text": "Single Machine" },
                      { "id": "ajson2", "parent": "#", "text": "Another Machine" },
                      { "id": "ajson3", "parent": "ajson2", "text": "Component 1" },
                      { "id": "ajson4", "parent": "ajson2", "text": "Component 2" },
                      { "id": "ajson5", "parent": "ajson2", "text": "Component 3" },
                  ]
              }
          });
              $('#using_json_2').on('changed.jstree', function (e, data) {
                  var i, j, r = [];
                  for (i = 0, j = data.selected.length; i < j; i++) {
                      r.push(data.instance.get_node(data.selected[i]).text);
                  }
                  var selection = r.join(', ').toString();
                  var targetControl = TcHmi.Controls.get("TcHmi_Controls_Beckhoff_TcHmiImage");
                  var targeTexttControl = TcHmi.Controls.get("TcHmi_Controls_Beckhoff_TcHmiTextblock");
                  if (targeTexttControl != undefined) {
                      targeTexttControl.setText(selection);
                  }
                  var defaultImage = 'Images/bulbimage.svg';
                  if (selection == "Single Machine") {
                      defaultImage = 'Images/automation.svg';
                  }
                  if (selection =="Another Machine") {
                      defaultImage = 'Images/Beckhoff_Logo.svg';
                  }
                  if (selection=='Component 1') {
                      defaultImage = 'Images/theremometer.svg';
                  }
                  if (selection == 'Component 2') {
                      defaultImage = 'Images/close_normal.svg';
                  }
                  if (targetControl != undefined) {
                      targetControl.setSrc(defaultImage);
                  }
              })
              .jstree();
          });
      </script>
How to change the content of tree dynamically
We need to build the JSON data, in this example mydata which can be used to re-build the tree as shown in the following code snippet.
function CreateStructureTree(mydata)
{
$('#using_json_2').jstree("destroy").empty();
$('#using_json_2').jstree
 ({
 'core' : {
 'data': mydata
 }
 });
}
CreateStructureTree(mydata);
The following code will show how to build mydata which has been used in our PLC Software testing HMI.
var mydata = [];
var myIndex = 1;
var lastparent = "";
for (let index = 0; index < myData.length; index++) {
    let singledata = {
        "id": "",
        "parent": "",
        "text": ""
    };
    const element = myData[index];
    if (element.matchingoutputs != null && element.matchingoutputs != undefined) {
        for (let index2 = 0; index2 < element.matchingoutputs.length; index2++) {
			let singledata = {
				"id": "",
				"parent": "",
				"text": ""
			};
            const element2 = element.matchingoutputs[index2];
            if (element2.output.length> 5) {
				singledata.id = "json" + myIndex;
				singledata.parent = "#";
				singledata.text = element2.output;
				myIndex = myIndex +1;
				lastparent = singledata.id;
				mydata.push(singledata);
            }
        }
    }
    if (element.affectedinputs != null && element.affectedinputs != undefined) {
        for (let index22 =0; index22 < element.affectedinputs.length; index22++) {
			let singledata = {
				"id": "",
				"parent": "",
				"text": ""
			};
            const element23 = element.affectedinputs[index22];
            if (element23.input.length> 5) {
				singledata.id = "json" + myIndex;
				singledata.parent = lastparent;
				singledata.text = element23.input;
				myIndex = myIndex +1;
				//lastparent = singledata.id;
				mydata.push(singledata);
            }
        }
    }
    if (element.analogdevices != null && element.analogdevices != undefined) {
    	for (let index32 = 0; index32 < element.analogdevices.length; index32++) {
			let singledata = {
				"id": "",
				"parent": "",
				"text": ""
			};
        	const element33 = element.analogdevices[index32];
        	if (element33.address.length> 5) {
				singledata.id = "json" + myIndex;
				singledata.parent = lastparent;
				singledata.text = element33.address;
				myIndex = myIndex +1;
				//lastparent = singledata.id;
				mydata.push(singledata);
        	}
    	}
    }
}
YouTube Video
Draw Pie Chart on TwinCAT HMI
We can draw a pie chart on TwinCAT HMI following the following steps
This sample reads the data from PLC and displays it as a pie chart on the desktop view.
=> Download and include the JS file for drawing (for example, from https://cdnjs.cloudflare.com/ajax/libs/Chart.js/2.9.4/Chart.js)
=> Include the file in your visual studio project
=> Read the PLC variables and create an array with the value we want to draw on the pie chart
=> Drag and drop TcHmiHtmlHost from the toolbox to the desktop
=> Copy and paste the following content inside the TcHmiHtmlHost
<script src="Chart.js"></script>
<canvas id="myChart" style="width:100%;max-width:600px"></canvas>
<script>
  var v = new Chart("myChart", {
      type: "pie",
      data: {
          labels: xValuesG,
          datasets: [{
              backgroundColor: barColorsG,
              data: yValuesG
          }]
      },
      options: {
          title: {
              display: true,
              text: "World Wide Wine Production 2023"
          }
      }
  });
</script>
=> Create a code behind file with the following contents
function ReadFromServer(symbolString) {
    return new Promise((resolve, reject) => {
        var symbol = new TcHmi.Symbol(symbolString);
        symbol.readEx(function (data) {
            if (data.error === TcHmi.Errors.NONE) {
                resolve(data.value);
            } else {
                reject(data.error);
            }
        });
    });
}
function WriteToServer(symbolParameter, dataParameter) {
    return new Promise((resolve, reject) => {
        TcHmi.Symbol.writeEx(symbolParameter, dataParameter, function (data) {
            if (data.error === TcHmi.Errors.NONE) {
                resolve(data.error);
            } else {
                reject(data.error);
            }
        });
    });
}
var yValuesG = [];
var xValuesG = ["Italy", "France", "Spain", "USA", "Argentina"];
var barColorsG = [
    "#b91d47",
    "#00aba9",
    "#2b5797",
    "#e8c3b9",
    "#1e7145"
];
Call the following JavaScript code when the host control is attached
console.log('HTML Host attached setupDataforPie');
async function setupDataforPie() {
  try {
        var italyValue = await ReadFromServer('%s%PLC1.MAIN.italy%/s%');
            yValuesG.push(italyValue);
        var franceValue = await ReadFromServer('%s%PLC1.MAIN.france%/s%');
            yValuesG.push(franceValue);
        var spainValue = await ReadFromServer('%s%PLC1.MAIN.spain%/s%');
            yValuesG.push(spainValue);
        var usaValue = await ReadFromServer('%s%PLC1.MAIN.usa%/s%');
            yValuesG.push(usaValue);
        var argentinaValue = await ReadFromServer('%s%PLC1.MAIN.argentina%/s%');
            yValuesG.push(argentinaValue);
  }
  catch(error) {
    console.log(`error occured in setupDataforPie = ${error}`);
  }
}
setupDataforPie(); 
Figure 05: Drawing Pie chart in TwinCAT HMI
YouTube Video
References:
=> https://www.chartjs.org/
=> https://www.w3schools.com/ai/ai_chartjs.asp
Download the sample from the link given above.
Next, let’s try to understand how to develop HMI extension at https://www.hemelix.com/scada-hmi/twincat-hmi/twincat-hmi-server-extension/
Ask questions related to Hemelix sample code and design at Google group https://groups.google.com/g/hemelix