Node-RED is a flow-based development tool for visual programming developed originally by IBM for wiring together
hardware devices, APIs, and online services as part of the Internet of Things.
Node-RED provides a web browser-based flow editor, which can be used to create JavaScript functions.
Elements of applications can be saved or shared for reuse. The runtime is built on Node.js.
The flows created in Node-RED are stored using JSON. Since version 0.14, MQTT nodes can make properly
configured TLS connections.
Installing and Running Node Red
Take an admin command prompt with npm (see https://nodered.org/docs/getting-started/local)
npm install -g --unsafe-perm node-red
You can confirm it has succeeded if the end of the command output looks similar to:
+ node-red@1.1.0
added 332 packages from 341 contributors in 18.494s
found 0 vulnerabilities
Once installed as a global module you can use the node-red command to start Node-RED in your terminal. You can use Ctrl-C or close the terminal window to stop Node-RED.
$ node-red
Welcome to Node-RED
===================
30 Jun 23:43:39 - [info] Node-RED version: v1.3.5
30 Jun 23:43:39 - [info] Node.js  version: v14.7.2
....
30 Jun 23:43:44 - [info] Starting flows
30 Jun 23:43:44 - [info] Started flows
30 Jun 23:43:44 - [info] Server now running at http://127.0.0.1:1880/red/
You can then access the Node-RED editor by pointing your browser at http://localhost:1880 (Node-RED must run on the local machine).
Start with simple data
inject node is always a node that can trigger the event so data can be generated. In this simple example, we shall feed some complex data, and that data will be passed to a function. In the inject node, we insert the following data:
{
"building no": 3960,
"street": "North 1st street",
"state": "CA",
"country": "USA"
}
We shall format the data with the help of the function node and send those data to debug node. Since this is our first example, we shall display the street name in the debug window. We have renamed the following from the default names.
Inject => Insert Data
function => Process Data
debug => Display Data
Follow the following steps
=> Drag and drop a inject node and double-click to set the JSON data
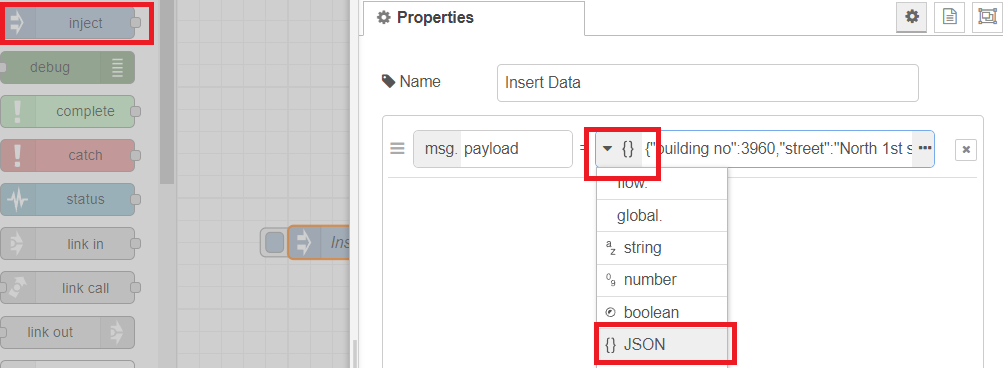
Figure 01: Configuring inject node
=> Drag and drop a function node, actually in this simple case we are not processing data here. But we can modify the msg.payload if needed.
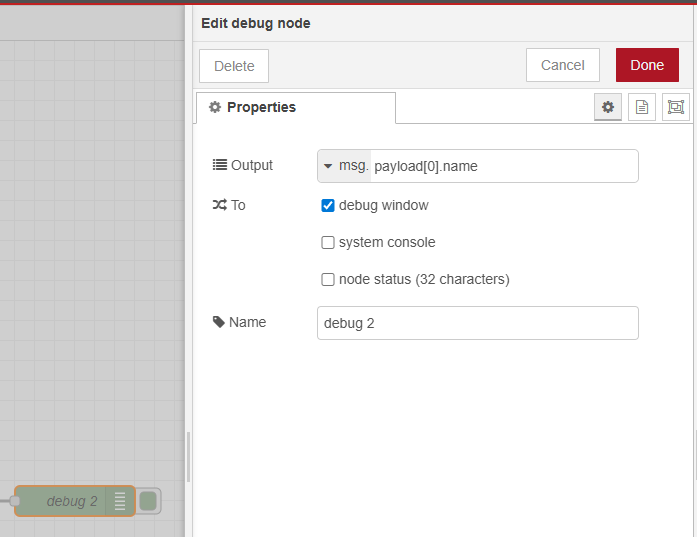
=> Drag and drop a debug node and rename it as Display Data
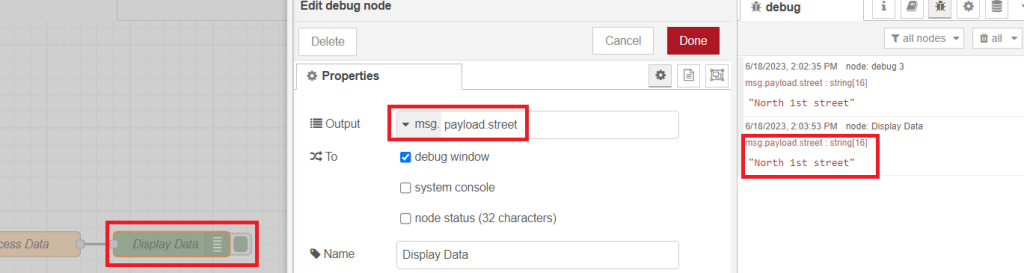
Figure 02: Configuring debug node
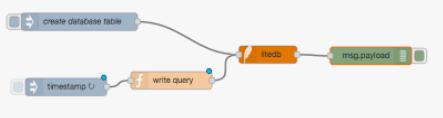
The final flow is shown in the following figure

Figure 03: Complete flow for our sample
How to import JSON in Node-RED
To import a flow, follow these steps:
=> Click on the three horizontal lines in the upper right corner of the Node-RED editor and click on “Import”.
=> Select the JSON file that contains the flow you want to import.
=> Click on “Import” and the flow will be imported into the current instance of Node-RED.
Install postgreSQL Node
Take an admin command prompt and run the following command. A PostgreSQL node is needed if we want to save data to the PostgreSQL server. It can run in an admin command window.
npm install node-red-contrib-postgresql
The image shows screenshoot.

Create the first flow with PostgreSQL
STEP 01. Start the Node-RED editor by clicking http://localhost:1880
STEP 02. Drag and drop the following nodes: inject, postgresql, and debug
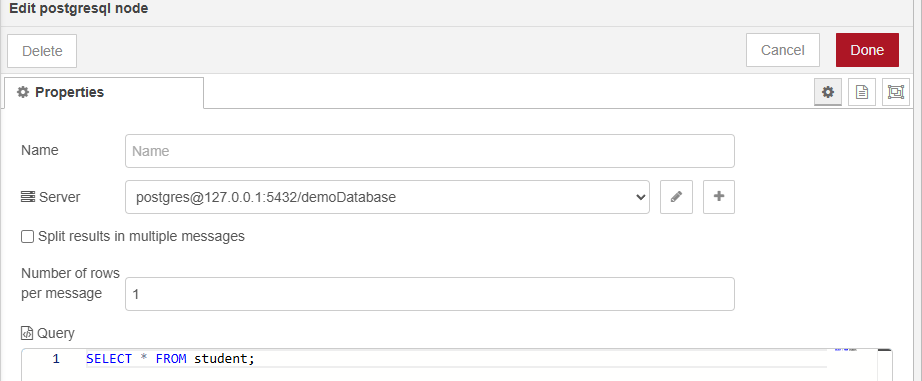
STEP 03. Insert PostgreSQL properties(credentials, port etc), we must have a demoDatabase in PostGreSQL server and a table student
We can configure the debug window as shown in the following window which print the name of the student
Install MSSQL Node
Take an admin command prompt and run the following command. MSSQL node is needed if we want to save data to SQL server. It can run as localhost or in the cloud.
npm install node-red-contrib-mssql
It looks the above command does not work if I try from the command line but works when I install it via the palate management tool.
=> Go to Menu | Manage Palette|Install then type mssql in the search field then install
=> Make sure the table has been created SQL table according to the page https://www.hemelix.com/sql/sql-server-installation/
The following image shows what kind of node we are using for our sample project.
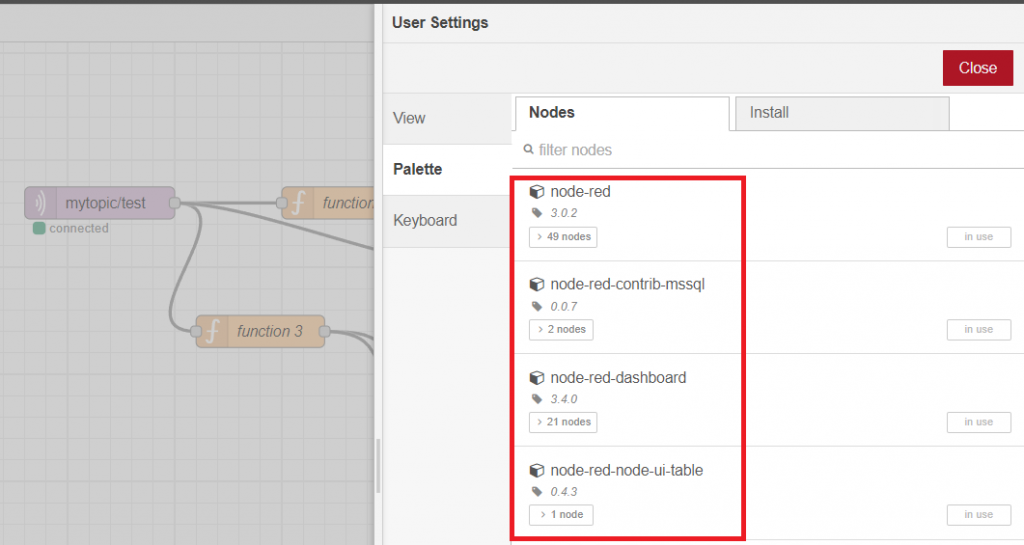
Figure 04: Installed palette for the sample
The big picture of this tutorial:
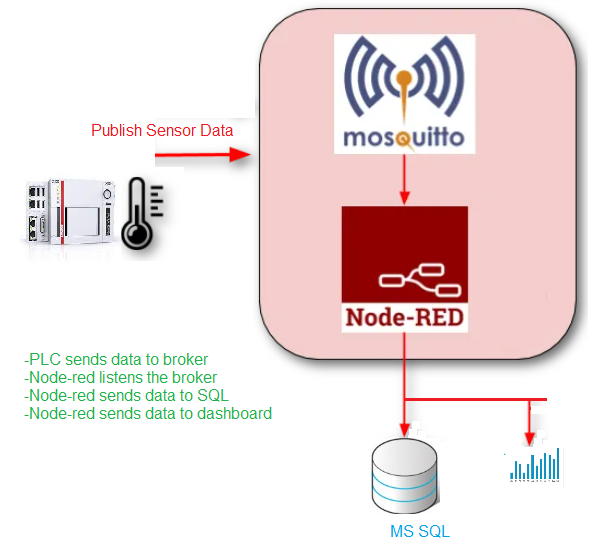
Figure 05: Overall view of the sample application
Saving MQTT Data to MSSQL
=> Drag and drop mqtt in node to the editor area
=> Configure the node (insert broker address, port, other security stuff and topics)
=> Create a table by using SQL management studio which matches the data coming from MQTT
The data coming from MQTT can be forwarded to the dashboard for visualization (we need node-red-dashboard and ui-table) and can be stored in the MSSQL database. For storing data we need module node-red-contrib-mssql.
The following image shows the used node for the purposes.
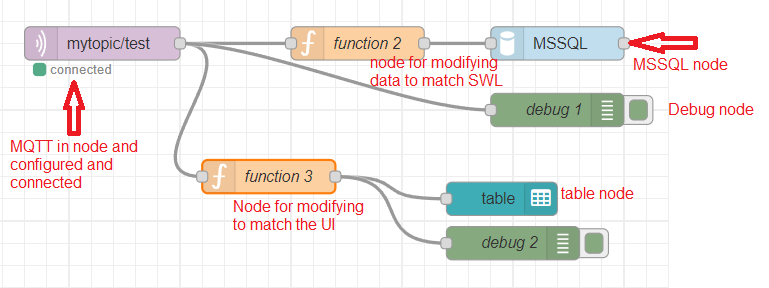
Figure 06: Created nodes and functions modules used
Contents of function 2
var time_ = msg.payload.IDSensor;
var Datetime_ = msg.payload.Datetime;
var Value_ = msg.payload.Value.toFixed(2);
var pld = "INSERT INTO [MyDatabase].[dbo].[MQTTData](IDSensor, Datetime, Value)";
pld = pld + " VALUES ('" + time_ + "','" + Datetime_ + "','" + Value_ + "');"
msg.payload = pld;
return msg;
Contents of function 3
var tableData = flow.get("MySavedData") || [];
var data = msg.payload.Value.toFixed(2);
tableData.unshift({
    "IDSensor": msg.payload.IDSensor,
    "Datetime": msg.payload.Datetime,
    "Value": data
});
if (tableData.length > 10) tableData.pop();
msg.payload = tableData;
flow.set("MySavedData", tableData);
return msg;
PLC program used:
The PLC program used in this test can be found at https://www.hemelix.com/automation/structured-text-mqtt/. When we run the program it connects to the broker running on my machine and starts publishing data. The configured mqtt-in node can capture the data and pass those to mssql module or ui module. The following two images show the contents of SQL and node red dashboard.
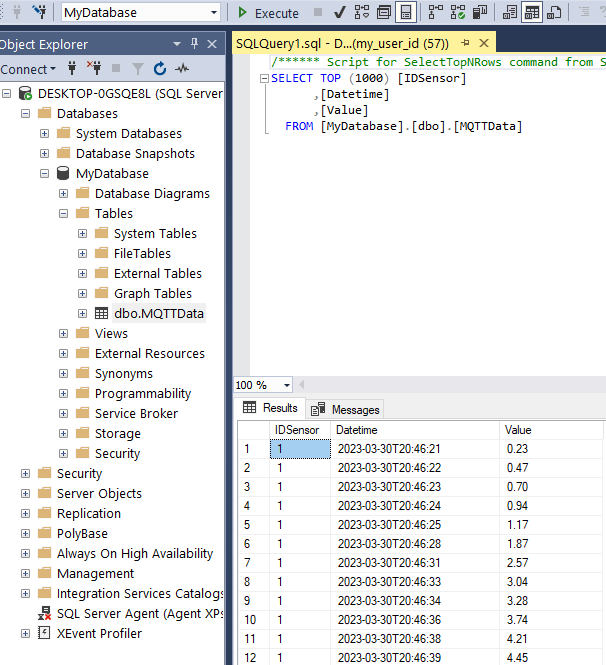
Figure 07: Database content for the sample, sensor value, and timestamps are stored.
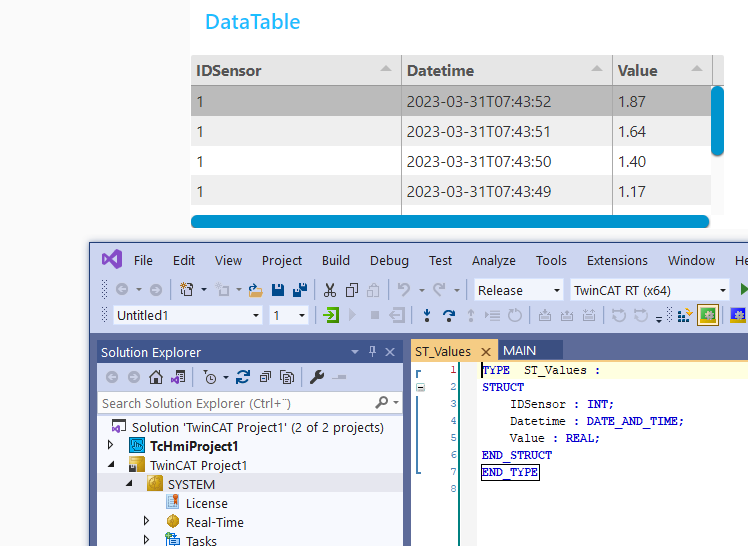
Figure 08: Node-RED dashboard and part of the PLC program
TwinCAT ADS client for Node-RED)
Reporting:
=> Install a new pallet called node ui table
References:
=> https://cookbook.nodered.org/mqtt/subscribe-to-topic (MQTT to NODE-RED)
=> https://nodered.org/docs/tutorials/first-flow
=> https://funprojects.blog/2019/12/26/sqlite-and-node-red/
=> https://flows.nodered.org/node/@s1seven/node-red-generate-pdf
=> https://www.youtube.com/watch?v=ryEFNy1E_LU (Read Serial port of PC then to Node red)
=> https://www.youtube.com/watch?v=DvTDFqL5GlI&t=85s (Insert delete etc)